

ArdeFIN
-
Posts
882 -
Joined
-
Last visited
-
Days Won
40
Content Type
Profiles
Forums
Store
Gallery
Blogs
Events
Downloads
Everything posted by ArdeFIN
-
Then some new holes to the felt part. As there was a picture earlier in the topic, the padding was layered a bit because the fitting was somewhat off. New holes places are marked with 'O', originally the lace was right next to the edge. Quite a lot of difference here. Then some extra material when comparing outer and inner fabrics: These will settle pretty nice when lacing is ready, but the extra material is still there. Not so much that I would've started to do something about these. Last but not the least for today the body lacing is ready. If you are thinking about the order I do these, it's pretty much intuitive. Begin from the cuff, it kind of keeps things on place there. Then the thumb loop which holds parts together and on place. Longest base lace starts from the thumb side at the pocket edge and goes to the heel. Then the break lace as the layers are still open towards the fingerside. And then continue the base lace through the finger stalls. These laces should be left pretty loose at this point to make it easier to adjust the layers and fabrics to fit right when doing the perimeter. These are the times when I get really excited about these projects. Soon it will be ready and catch some tennis ball to reveal the results.


-
So the 2200 version is now under works, some were done earlier already but here goes the update: First palm and finger area. Pretty much the same as with 2000 glove was. Learned some things from that and this went a lot better already. Main plastic replaced. The original was flattened for some reason, end of the thumb part was curled possibly to open the pocket wider and also some minor cracks. Also the original ended at the wedge point of the cuff, and I extended the new plastic to cover the whole cuff area. And the new one with somewhat different shape, I realize I'm starting to do these with my own taste and habits around. Well I'm doing these for myself atleast for the one time of testing. Thumb carbon was given quite a lot of abuse but with some heat and pliers it got back in shape. The bottom side on the picture is towards the pocket and the edge had gotten a lot of beating from the pucks hitting the edge of the pocket. And then the repaired shape of it. The top leayer peeled of with very little heat and I think there was some minor material problem. The surface looks like carbon but it definitely is plastic first. Last picture is from the break line, just to notice that while this glove is made in Canada, the maker just would have to take care of their work. The pre made holes on the carbon sheet are visible on the nylon fabric but as they didn't aling properly there are new holes made. Doesn't affect noticeably here but might have some effect. The same thing was on the 2000 glove too so it's propably a desing flaw more than craftsman doing their own.


-
Hard to say from those pictures but yes, another layer is added on shoulders. It looks smaller than the original shoulder caps. The sleeve padding is all the way different and looks like its built from three different plates instead of the basic models one piece bent sheet. Would definitely be nice to get a chance to look closer on one of these pro returns. Once again we get to ask, why Vaughn doesn't offer this model for normal customers? I don't believe its hand built from scratch but they have ready made parts and plans for these.
-
I'd say they trimmed down the area under 'CCM' even more. That area was the famous problem that "needed to be crushed" to work properly. The Eflex5 seems to be really flat and streamlined, as it should be and the Vaughn is too. The white stiching goes straight through the break line on EF5 while on Axis it makes a curve at the heel end.
-
Now I have some pictures of my danglers. First one is the one I used a few times before shutdown. The front or chin loop goes through the holes on the mask and through the danglers front hole and knot there. I routed the ends back inside for cleaner look. This way the dangler never rises too much to my line of sight. And it also reduced some of the noice from dangler banging around. This only is possible with masks having those chin holes. Bauer NME atleast. White stuff on the chin and at the end of the dangler is 2mm thick felt with adhesive used under furniture feet. This solution is almost noiseless. The next evolution is yet to be tested. Chin is laced the same way as it is working really well. I had some issue with the sides riding up and getting stuck to the cage occasionally. Not much of a change in lacing but effective as the dangler is now staying down really well except for the real world test. Here the black soft material is velcro with adhesive, I wasn't able to find the felt in black but the velcro does the job as well. I have to add some as the dangler is still finding hard spots to knock.


-
Plain impressive to read these when people are doing things and thinking what they do and why they do it. I have to take a picture of mine and give my input for the topic too.
-
Yes I'm aiming to keep the pad as much together as possible due to them being in good condition and obviously very little use. I've been looking for those polystyren sheets and parts but haven't seen them yet. Have to recheck next time because I'm sure they are there as it's been a normal material there for a long time in RBK/CCM/Lefebvre design. I opened the package today to see how things are now. I didn't give a lot of force to the pad yet as the plastics are airtight and the glue might take some time to cure completely. But for what I tried the pad is really, I mean really stiff above knee break. The difference is something I didn't expect at all for such foams used there. What was disappointing with that is the fact that I now have to open the inner side of the pad and attach the same sheet with new glue there too. It is flexing like hell now and the face of the thighrise is twisting as a result. Hopefully I got enough of the curve included to the pad as it's not really bending now and I don't want to open that place again to change the curve. Also got the calf flap halfway done, new velcro for the knee strap and about 10mm shortened top edge to give more room for calf.
-
Not too much for today but a little, scratched all the old glue out I could. For the harder sheet I first used sand paper to break the surface. Then using a drill bit on a drill swinged all over the sheet to open up the surface even more. Then did the same to the main sheet inside the pad for as long in as I could. The top end of the pad is so tight inside that it'll propably hold the sheets together pretty well as they were still attached by the original glue. Then some glue that defines "will attach almost all materials" but they don't usually attach to plastics. We'll see how it goes with this one. Instead of strings all around the sheet I gave it a full covering glue layer as it should be fully attached to the other layer. And yes the glue used will remain pretty elastic when dry. Then some pressure with clamp and some wedge under the thigh rise to try and secure the S-shape. Only now I realized I could've heated up the sheet and give it a little curvature before glueing. There are two wedges under to keep the thigh rise straight. Hopefully it regains some of the original rigidity with this operation. Then I opened up the calf flap to start repairing the velcros and add the new knee - calf strap. I'm going with nylon strap and propably a plastic quick buckle a'la Warrior pads. Why try to invent it again?


-
Inspiration to make some progress with these pads now. It was at 2630g about for a pad at the moment, and as said earlier the knee cradle padding is gonna go and I'll have the cradle as open as possible. And as smooth and slick as possible too. Slicky is the easiest part as the base material used is nylon fabric which does the job for me. The added padding was laced in with the body lace which I don't want to cut, so I just cut the padding open by the lace. It cameout decent, no damage to pad which was the main thing and the padding is still useable for some future project. Also the thigh pad attachment had to go, no thigh pads used with these anymore! Then I just though why the heck not and opened the outer side of the pad to take out those top three leather pads used for the leather strap anchors. And as it usually does the thing went out of hands and with the same process I opened the side to the ankle level and removed all the leather straps. This has one benefit which made my decision easier, now I can access the calf flap and open it to replace and add some velcro for the new strapping. You can see in the picture the knee velcro is halfway ripped off already so repairs needed there. While the edge was open I thought to rip off the tags too. A picture of them to remember what this all was about. What does it mean on the identifier: ...-cust? Is it meaning custom or customer line or what? Atleast the colorway of all black except stiching is pretty rare? Then I looked at what kind of materials are used in the body. There seems to be three layers, the front layer is hard but pretty airy foam and the two inner layers are softer but airy foam, density might be medium. Same kind of material that is used on camping matress. On the outer edges of the thighrise the inner soft layer is replaced with a sheet of the hard foam. The thigh rise is a bit wobbly and not as rigid as I had expected and here might be the reason or atleast part of it. The glueing between the layers has failed and by that there is a lot of extra play in the materials. Side note on breaks, these pads are marked almost everywhere to have double internal break, but materialvise there is only one break below knee. Atleast on these pads. This is probably one reason for older pads to become really soft, but there's no easy way to fix it. Many of the newer pads include only two layers of different foams and maybe a layer of some composite material. And with better glueing and rigidity the problem on newer pads is that materials just crack at where they are bent. And one last for this evening, the weight I managed to get rid of today. So after todays achievements I'm at 2430g, which is already pretty good I think. Ofcourse there will be weight coming back to the pads with the new strapping. Next is to figure out how I want the velcro on the calf flap and dismantle, add and put the side back together. For the knee-to-calf strap I was going to use nylon but not sure if I go with velcro or add in a quick buckle in Warrior style. No elastic here anyway. To the outer calf strap I thought it would give some adjustability if I use the leather strap openings and join the straps together to the outer side and attach with velcro. I'm still battling myself with boot strap, do I need it for anything? I'm used to have it on my Warrior pads, but unsure if it is really doing anything but being in there. Though it is elastic material so it'll work in there without noticing. I'm just a little tempted to add an elastic strap here too but is it necessary or just extra weight...


-
Few pictures to close this case. Went with the wider pocket, works nicely as the whole glove does. The wide pocket gives this odd feeling when puck enters and I close the glove, the puck can still move around freely as the pocket isn't stopping the movement. Closure is about perfect so there is no risk for pop-out but the feeling is odd. Had this same issue with my Simmons which also has a wide pocket from the factory. The natural white lip jumps out to you, Vaughn white isn't available. Some completely different color like black or red would've done it sharper. Then I'll get going with the 2200.


-
Perimeter laced and finishing touches are near. I was a bit afraid of the glove become stiff after lacing but hell no! It is really convenient to use. Whadda you say for the pocket, should I make it the orginal way and stuff the T spines close together: Or go the other way and separate them over the break line? I do like the latter more because: 1. it makes the pocket look HUGE! 2. adds a lot of lace to the pocket and especially the mid lane which then sucks the pucks in (haven't really tested this yet) 3. Swapping the finger side spine over the break line easies the closure a little and stops the spine from twisting when the glove closes. On the con side I'd have to figure out a way to lace them spines, as normal lacing isn't going to work. One picture from the top view.


-
Here we go. Dang it felt good to wear those pants and Brown after long time. The Brown felt heavier than I remembered but then again I had a college as underwear. And the pants fit like a charm. I just like these X2 pro from Warrior. So the first picture for the topic, the front flap completely unlaced. There is a slice of elastic material at the bottom holding it on place and the inner belt ofcourse. Then me inside the pants, inner belt tight, and the shock cord pulled outwards. There is a nylon strap loop on them to give better durability. Outer belt and lacing loose as possible. Yes, I am mostly skin and bone. Shock cord is 4mm and looped to make it four times. That is the elasticity I want and is enough to keep the pants up nicely. Different angle to try and show the Brown C/A fitted in and the shock cord attached to carabiner. Stainless one here. Would be better if it was a bit covered but for low level beer league games this has worked out. There seems to be plenty of room but I'm not wearing jock (Warrior X pro) which lifts the belly flap out. Still I have a lot of room when fully geared, but once again I'm nearly without belly. On the back of the C/A I have same kind of shock cord strapping and carabiner. That attaches to the pants nylon lace loop which is simply around the spine protector. Inside the protector, yes because this way the back of the pants are free to move and won't be caught by the C/A. And also this setup allows excellent body rotation too as pants stay where they should and C/A can follow my shoulders freely. While I'm using Warriors and have the R/GT C/A too still, there is no reason why this setup wouldn't work with any other brand or mixed setups. And the suspender part could be implemented to non-tuck style too. The front shock cord just ties inside the C/A I have to say that I might do some upgrades and updates but this is probably the wearing setup I will use for my games as long as they last. Ask and comment freely.


-
What C/A you are using? I use my chesty as suspenders at the same time with shockcord on front and back to give the elasticity needed. Not exactly the same way as Ross but close. I'll take some new pictures of my setup tomorrow when I go to my storage again, just tempted to wear my gear once again since november....
-
Didn't take a look at my pictures about how the wrist strap was before. But what I'm used to with them across the brands it's usually tightened by pulling the strap towards right hand (regular glove). With the padding and quidance for the strap I had a problem for how could it be tightened? And when I would like to open the glove to dry out the strap would prevent that too. This Vaughn design is a little awkward to say but I think it'll work good enough. And if the glove is as good as Vaughns usually are for my hand I wouldn't even need to tighten the strap but let it be on a sweet spot. Here's how it is now and the nylon strap will be routed through those cuts on the red fabric. The black buckle is usually at where the strap comes up now. Had some of the lacing done already too, but have to go the shop and get more lace to get the glove ready. At this point it is working really well and the feel is very familiar to my existing V6. I'm afraid it will become quite stiff and how the break will work is a question yet. Is that location of the boot of the T like offset compared to break? Normally it is at the break line but then again I don't know there is any reason why it couldn't be offset. Binding on the finger side edge is awful but it will do for me and it doesn't reguire a whole lot of dismantling to get it repaired later if it needed to. One picture of the outside while there isn't a lot to see. Closure to ice is very good to cover the puck. Does the pocket seem to be huge or is it just an optical distraction?


-
Had a lot of fight with this 2000 glove to make it work. Well I can't tell if it is now but that is being revealed pretty soon as I get the glove together again. First a picture of the cuff where I added a layer of 8mm LD foam to fill up the empty space the HD foam has left as it's been compressed during time. Then one picture of the new plastic. I shaped it out from the palm jenpro so it should fit in pretty well. The shape is a lot different than the original plastic was. I had some trouble with the palm padding and finger plate. The plate was sewn in a bit off and that caused it to being skewed and miss the break line partially. Fixing this would require me to take of the plate and reset it which I wasn't really up to now since the glove was pretty good before. So I just cut out the extra felt on the edge to give some room there. In midlane you may notice the black circles which mark where the holes next to them should be if the padding is aligned to other parts by the finger plate holes. Well actually the mid plastic was really just thrown in and that's it. The holes on the plastic should be on a straigth line to fit the jenpro sheet holes. And if the holes where matched and used like it is the lining would be as follows. This is about the same amount that the finger plate is skewed too. While I'm not going to fix the finger plate I made a new plastic for the midlane with tapered ends and a narrower overall size so that it fits in the channel sewn on the felt. (didn't manage any decent picture on this one) Narrower plastic here with an improved alignment should help the break to work smoothly. I'm still trying to figure out how could I move the knots of the mid lacing away from my palm area. The pocket end is easy though but the other end might need a few more holes to the jenpro.


-
The carbon sheet itself is mostly carbon on Vaughn. Only it's not hardened and solidified by resin but plastic to keep some elasticity. Actually it might be something else than plastic like PE. But it behaves like plastic, melts with same amount of heat as PE etc. If that was what you were referring to. I'll see if I have a good spot to take a picture of the structure. What I've written down is what I see. I haven't read or found any absolute fact on this material Vaughn is using. Edit: Got a picture of an edge from the 220 gloves thumb protector. Can't actually tell how many layers there are but quite a lot.

-
Not a huge improvement today but just a little forward. Used a die cut at work and made some holes to the reinforce plate. Then a little heat to mold to fit the carbon. Then some clamps and 1,5mm drill bit and a lot of holes for sewing the parts together. Used a 4mm drill bit to clean the holes just for doing it and then hand sewing with doubled 40 size thread. There is a minimal slack between as there is no way to tighten the thread as the sewing machine does. But then again it might be good thing for durability of the sewing as little impacts won't tear the thread right away. The backside behind the carbon isn't that smooth but hopefully there will not be any trouble. I didn't want to use the torch here to smooth things up.


-
That seems to be a compromise of achieving good seal on ice but still not too much of structure under the calf/shin area. If we look at human leg and especially the shin. On the inside edge the knee is very pronounced as is the ankle. But there is a wide variety in human structure and goes in here too. That might be one reason that some pads just don't fit someones butterfly but cause strange problems. That is having too much or too little support there. I looked through some of those THS reviews and the photos of the leg channel and strapping are really nice to compare. Quite a lot of similarities after all. Especially the Axis/Eflex5 was nice to look at as there are some similarities some idea that could easily be adapted to my project. Are there other websites where there are pads reviewed and nice set of pictorial data included?
-
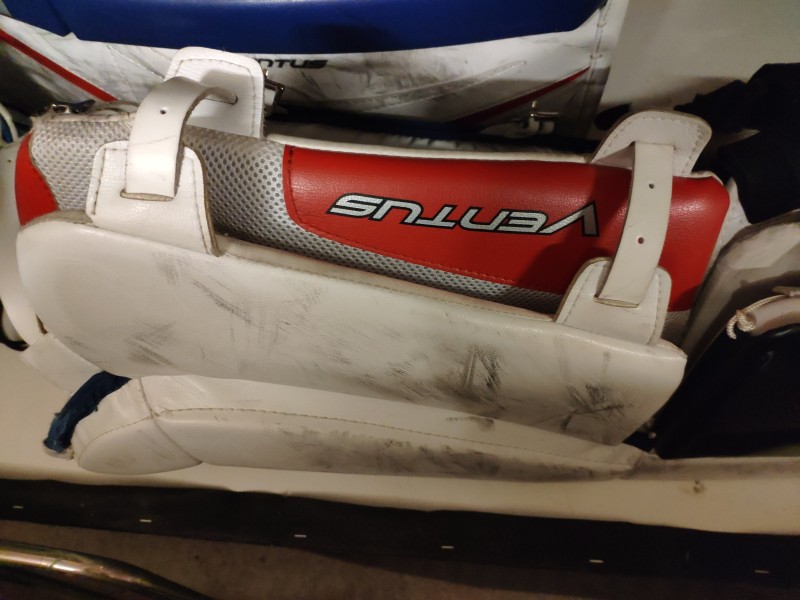
You mean that soft padding around the knee, circled with green on picture? It's not on the landing gear, only on front face and creating that outside knee flap. Landing gear is completely separate which is nice. Yes that is going to be removed. All open space for knee and knee pads. And actually I don't know why would anyone these days like of any additional padding towards the front face of the pad? Looked at my LT88 pads lying in the storage and noticed interesting detail on calf area. The outest flap there is recessed in for some reason? The flap with Ventus text on it is only very soft LD foam and seems to be more of a comfort thing in these pads.

-
Time for some finger plastic and carbon. I've only had old gloves where I've seen this Vaughns carbon thing so I don't know how it is as new. But when old and used it always seems to start break into separate layers and loose the rigidity. The material is actually super thin carbon sheets infused with some plastic to make it like normal carbon sheet is except that due to plastic it is a lot more flexible. And not using the resin it isn't breaking the same way. In cathcers I've seen (4 or 5 total) the edge is always layering out. On the positive side the normal curling there is on Vaughn catchers isn't happening. In these V6 gloves there is added 2,5mm (1/8" maybe?) layer of plastic to reinforce the edge. It has done a pretty good job but it's time to put a new piece on there. (Threads already cut before I remembered to take a photo of it) (Sidenote, on SLR catcher this added plastic had been upgraded to same carbon material and it was a mess.) I didn't have any good picture of the layering out of the material but something had to be done to the carbon also. So earlier I've burned some edges of the carbon sheet to clean them up and noticed the plastic like reaction to heat and flame. So the plastic could be melted at 250-300 degrees celsius and while it isn't really good for the plastic it should renew the sheet atleast a little. So let's try it out. Small gas torch and carefully heating up the edge from a small area on both sides for as long as the plastics seems to start melting. Just a little more heat and then flat headed pliers and carefully pressing the material straight and together. Cool down and yes! It really does go together again. Not really nice looking but edge is solid and pretty rigid also. And it was pretty badly bent outwards which is also repaired. I'm not trying to make it perfect in any means as there is going to be the plastic edge on top. On pictures you can notice the old factory sewing has gone throug hthe carbon which has more like cracked. Also the die cut holes have same cracking on the edges. Durable and lightweight material that still needs some improving to be a solid performer here. And the weight savings are a bit lost with using basic plastic on the thumb plate. One photo of the plastic reinforcement forming out of 3mm thick sheet and the carbon edge pretty much ready to go.


-
Excellent input! More of this, everyone who are using goalie pads and are thinking of anything about them bring it out! And even more than discussion about what is I would like to hear if you have some dislikes on certain things. Like leg channel being too narrow or wide. Maybe some wedge or flap is in a wrong place, knee cradle with wrong material or shape, what ever. From what I've seen with the gear I've looked at closer I'm really not convinced that all the people who design these things have any clue what is working or not. And then with all the details it comes to the point where every part of leg pad here should work together as a whole and do it well. Two details working solid alone might not go together at all. There is a whole lot of dynamics involved in these leg pads if you really start to think about it and break it into details. And whats best or worse of it is that all of us goalies use this gear just a little different ways. So what really clicks for some doesn't at all for the someone else.
-
If we only talk about how the weight is distributed on Prices legs in the picture, he form a tripod by both knees and right ankle/toes. Which again has the optimal stability of such stance. And Price is also leaning over his right leg so the left legs ankle and toes are under very little pressure there. If you support your upper body with your shin area, that'll give a huge stress over to the muscles around your knee to keep it in position. Try it with some foam pad or such, move the support from under your knee and down the shin. When you sit down over your ankles while butterflying you settle your weight there. But that is a situation where you aren't really able to move anymore as a goalie. I would even claim that when down on your knees, you are supposed to be on your knees and nothing else. Human body isn't "designed" to be on knees so it isn't very nice position to be for a long time though. That Overdrive text was a bit off and also oldish. It was a lot about padding protecting the ankle/skate area that is preventing you from setting your steel to ice. I can't drive my ankles down so that I could use the steel hitting ice, I have to lift my knee also. Ofcourse I'm not really flexible so some more athletic people might do so. But there was also a lot about the leg channel to reach towards the ice when going down to ankle area. I'm tempted to add some of that to these XLT pads. I just have to figure out how I'm doing it because the leg channel lacing isn't helping in as it is originally and I'm not considering to move it, atleast not yet.
-
I gave a thought for this today while I was working on floor level on my knees. No matter how I was setting my feets around and also did try some goalie style stances my calf or shin never did hit the floor. All of my weight is on knees and I stabilize my body a little with my ankle and mostly using my toes. Actually if you think about this from physics the better your stability is if you stand on three/four individual spots rather than on long flat surfaces where the support to your leg will vary all the time because the materials used in there have to be soft. I'll have to look into this a bit further and also check how things are with my Warrior pads. Then why we need that pressure to the shin section? I think it's purely to close the gap between pad and ice. The Kova pads are equipped with huge, wide and open leg channel. And in Vesas video it seems to work for him perfectly.
-
You should make a short review / presentation of this one, there are a lot of special details already in the picture. The belly area looks interesting? And the shoulder floaters, NHL spec?
-
Looked through it and there are some things and ideas yes. About the leg channel strapping, what are the benefits of adding a second elastic and connecting them together to the velcro? Simplicity of use ofcourse is there as you only have "one" strap to set to the right setting. If I go with dual elastic, or one wide elastic, is there any preference to the height of it? This naturally is also about a possible professor strap which I would like to try as that then reduces the effect of the elastic, or atleast the top one if there are two. I looked at the Brians Opt1k leg channel which is really nice also, but this Reebok has one difference. There is only one flap on the outside and three on the inside. As where Brians uses 2+3 where inner flaps are connected together with wide elastic and the outer ones are more like attached together so that they are not flying around. And after all this debate I wonder why there has to be like 3 inside and 2 outside flaps on the leg channel? Wouldn't it be easier and simpler and all to have just 1+1 or maybe the 2 on the inside is needed, one to stand against the ice and the other making the leg channel. Kova pads are the most ascetic ones there are I think, but with all that they have included are for reason. And nothing extra. Leg channel going inclinated is one interesting feature on them, you have your skate as close to the ice as possible. This really is a new world to me and the more I try and study it the more there are questions and ideas. It'll be an interesting adventure.


